Getting Started: What Tools We're Using To Manage This Project & Keep The Build On Schedule

Process nerds and software junkies, rejoice!
If you're wondering how we're managing all the tasks associated with building Wandering Aimfully (WAIM) and—because we like to make things hard on ourselves—simultaneously documenting the entire process of building it as well on this handy under construction blog... well then this is the mega post for you.
Full transparency: The tools we'll talk about in this post are incredibly helpful, but our organization system isn't perfect. Our desktop screens are loaded with screenshots galore.We have 27 variations of design files. And there are more scrap papers lying around our house/desks/kitchen with scribbled to-dos than we'd like to admit. Okay, realness shared.
We're gonna walk you through the big three tools we're using to keep track of everything and to stay on our pretty aggressive time schedule. We hope it not only helps you think of new ways to organize your to-do's with any big project, but that it also shows you exactly how much work goes into build something so it might encourage you to finally get going on that idea you've had in your head for a while!
Here are the tools we've been using to keep track of everything, along with a quick overview of how we have been using each one:
the big three
(This Is Us reference, anyone?)
Asana used for: Task Management and Scheduling
Google Drive used for: Time Blocking, Writing, Asset Management

Airtable used for: Content Planning, Scheduling, and even Time Tracking
Using Asana to organize all the pieces
Breaking things down into categories
Wandering Aimfully is not only a website and brand, but it’s also a business, so it will have customers, a sales page, a customer dashboard, and a bunch of other items that need to be actually constructed, not just blog posts that need to be written.

Caroline admittedly gets pretty overwhelmed when there's just a random list of hundreds of things to do, so she suggested we sit down, write down every task we could conceive of that needed to get done before launch, and then break them down into categories so we could clearly see what needed to be accomplished in what order.
Then, we used Asana to set up those categories into sections using their boards feature. (If you've ever used Trello, this "kanban" style layout functions similarly to that - which I've only recently learned is very different from the can-can dance 💃🏻.) All we had to do was go section by section and add every task we could think of that needed to be accomplished in that category. Our boards were as follows:
Branding - Included the obvious tasks like creating the logo and brand identity, but it also included time for figuring out our Brand Story: what Wandering Aimfully is, who it is for, what we as a brand stand for, what we value, etc.
Product/Customer Experience - The basically included the business side of things and anything related to what was included in the monthly membership product.
Customer dashboard - More on this later, but we wanted to build a custom web experience for our existing BuyOurFuture folks and new Wandering Aimfully monthly members.
Website - Tasks related to designing, building and managing the new website.
Site content - What are we doing with all our existing content from JasonDoesStuff and Made Vibrant, and what content will need to be created for the site going forward.
Social content - Deciding what we plan to do on FB, IG, Twitter, YouTube to build brand awareness and promote the membership, and creating whatever assets we need to related to that strategy.
Marketing/list building - How will we attract new customers and continue to build/interact with our audience through email and other means.
Beta testing/launching - Tasks related to testing everything before we officially promote it, and how we plan to release this sucker out into the world to strangers.
Public "under construction" site - Finally, the most META part of all, what you’re reading right now! Any task related to documenting the build and presenting it on this site went into this category
The key was not to try and think of everything right out of the gate, but to get enough "down on paper" that we could see at a glance what needed to be accomplished and that would give us an idea of where to start.
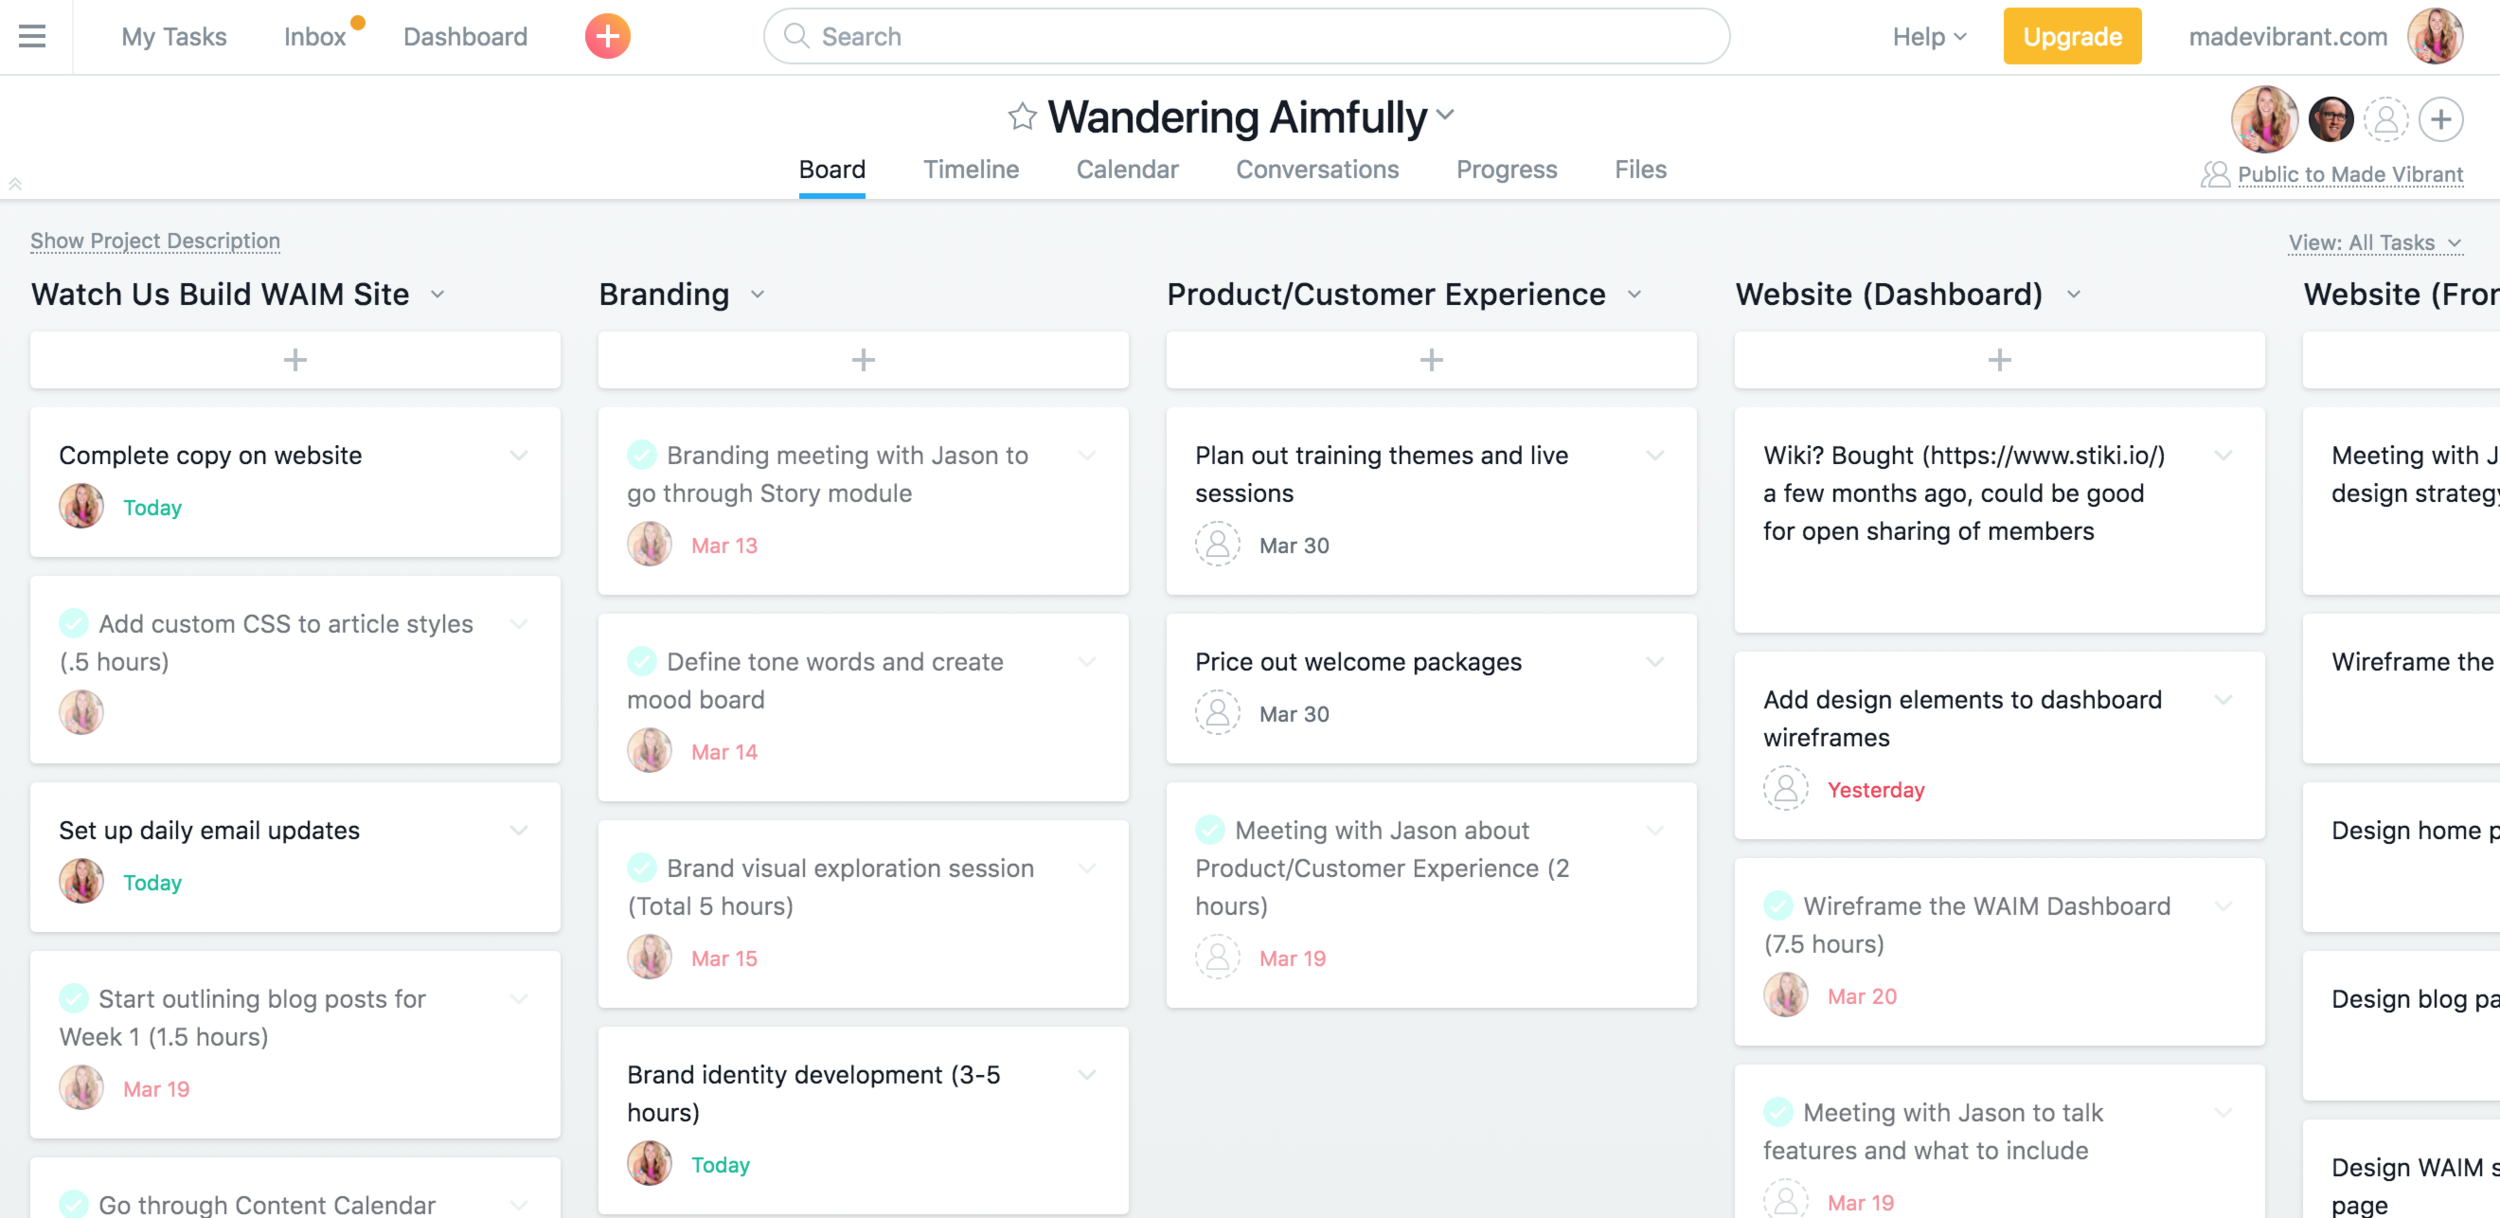
Wandering Aimfully Project with boards in Caroline's Asana
Now, What do you do with each task?
Within each task card, the features we use most often are: assigning as task to a person and, most importantly, assigning a due date.

Task list for the day filtered by assignee
For assigning a person, we actually only use this feature when it's a task that clearly falls on one of us. This allows you to see all the tasks filtered by only those assigned to you, which gives you a good idea each day of how to plan your day and what you need to accomplish.
The most useful feature is definitely the assign due date feature because you can basically give yourself deadlines on every task. This also allows you to see all of your tasks in Calendar format, so you can block off time in your schedule each day to accomplish the task. For example, if I set March 23rd as the due date for Caroline to finish the Brand Guidelines, then she can now see that pop up on the Calendar as a deadline.

Assigning a due date to tasks or even subtasks in Asana

Then switch over to the Calendar view to see where your tasks fall by date
If you're not familiar with Asana or it feels overwhelming to you, I highly recommend checking out some of their walkthrough videos. If you still feel like it's too much, stick to your usual method of list making or go straight to Google Calendar to assign tasks to dates.
Task management is really just about getting the specifics out of your head and tied to a date so you know what you plan to do and WHEN you plan to do it.
Using Google Cal to block off chunks of time each day and Google Drive to manage our assets
Let's start with the fairly obvious one: Google Drive!
Because Caroline and I are cross-collaborating on multiple parts of the process at once, we need a seamless way to share files and work on the same documents back and forth. A cloud-based system makes the most sense for that, and Google is the natural choice since it's already open pretty much all day thanks to Gmail and Google Calendar.
We save every single file related to Wandering Aimfully in a shared Drive folder, organized by topic, which means if I'm editing a video and need a logo or she's scheduling a blog post and needs the text I've written, we each know exactly where to get what we need.
(We also sync the Wandering Aimfully folder to our Macs using the Drive app so that it just appears as another folder in our Finder window and we can drag and drop like we would any files on our Desktop.)
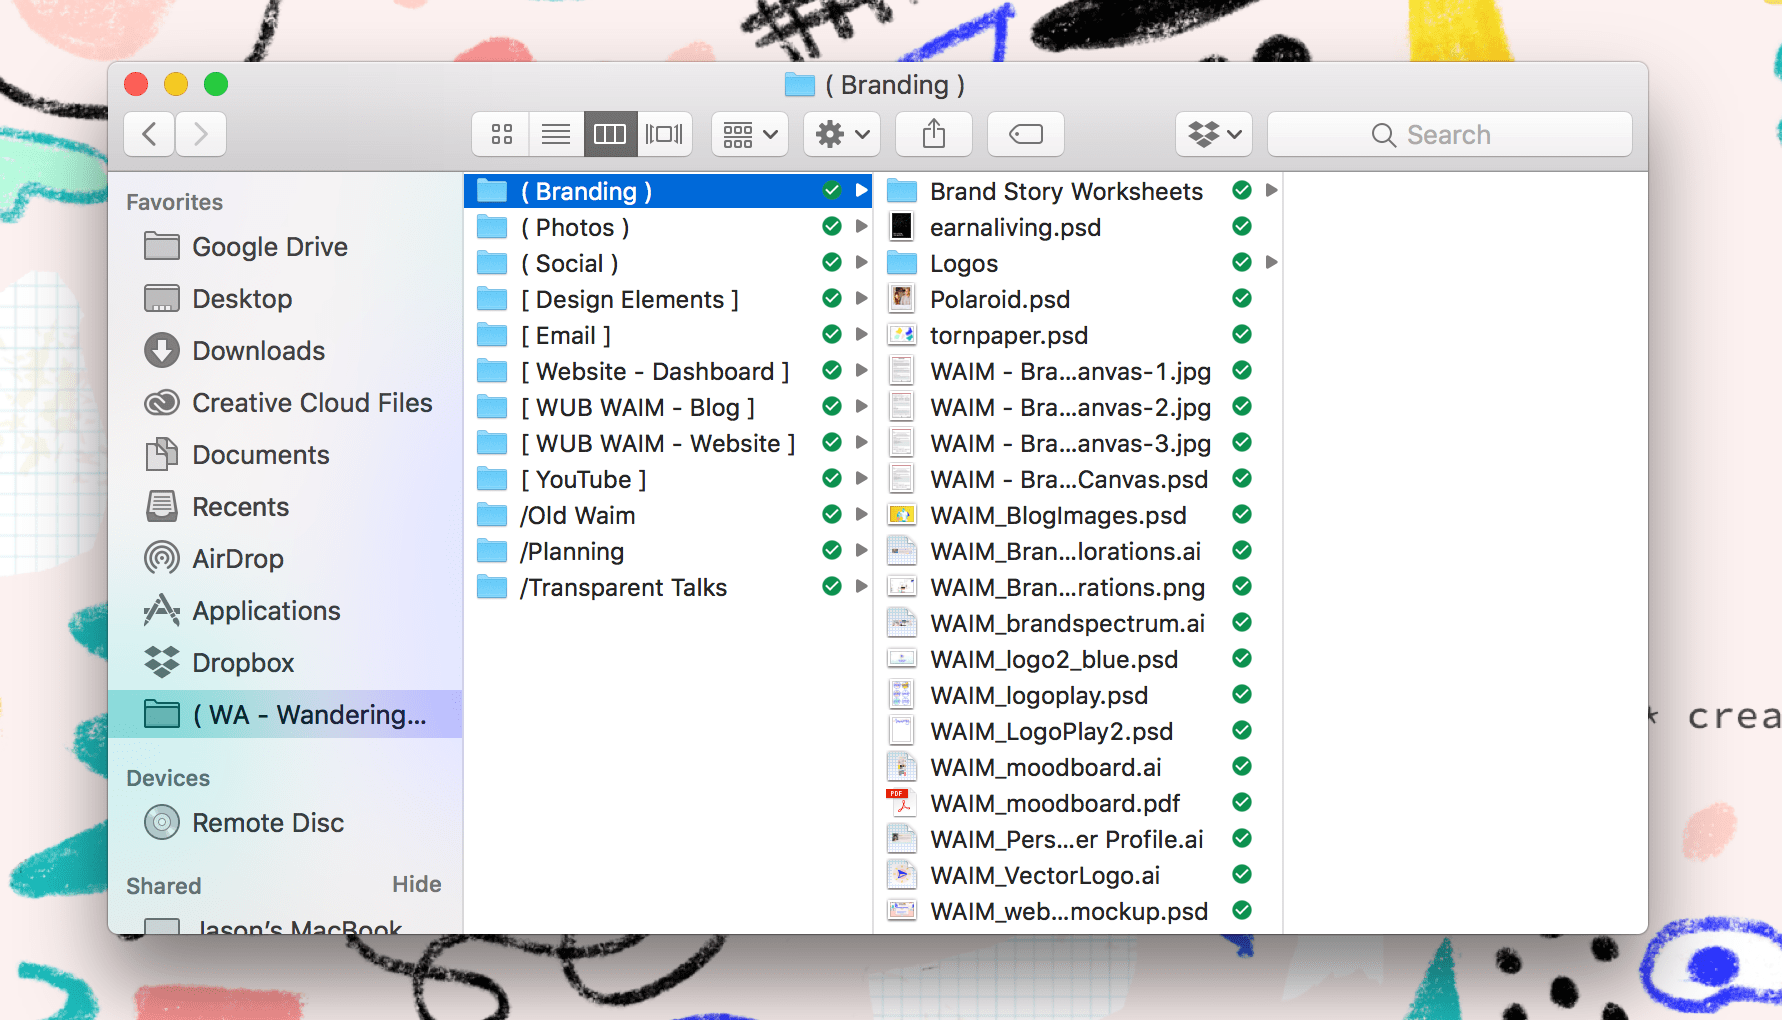
Using Google Drive's Mac app, you can drag and drop files like you would any other folder in your Finder

When you save files to any folders synced with your Drive, they will automatically upload to the cloud
Google Calendar
Another Google app that's essential is Google Calendar. We both already use this for our daily calendar/time management, and we both have shared calendars so we can view each other's schedules. We know exactly what the other person is working on and if we have any outside calls or appointments we need to work around.
I (Jason) have used Google Calendar to break up projects into time chunks for years (like a boss!). I introduced Caroline to this back when she started Made Vibrant, and it’s been a great way for us to keep track of how much time we're spending on a project.
With that experience, it was an easy transition to use Google Calendar to take the boards and task cards from Asana, and assign actual time blocks to work on those individual tasks over on our calendars. While it’s not a perfect system, and we don’t always stick to the times we’ve blocked off, it’s incredibly helpful to see how much time we’re spending (or need to spend) on certain areas of this build-out.

Yellow is Caroline's calendar and Blue is Jason's. It might look action packed but that's just because we intentionally try to schedule every hour we have, even if it's to go to the gym.
Daily meetings to stay on track
Daily meetings are how we keep our sanity while working together! Each morning we have a standing meeting at 10am where we do a couple of things:
Share a moment of gratitude for one another. (It sounds super touchy-feely I know but it goes a long way. When you're working with your spouse and you're in a time crunch it can quickly become tense if you aren't taking time to acknowledge the hard work each of you is putting in.)
Go over the big buckets of things we’re working on that day (designing the customer dashboard, writing this article, editing a video, etc.)
Then we jump into each bucket and discuss which one should be a priority based on when we’re most productive (or if we’re working around other things on our calendar, like vet visits or lunch plans with friends etc.)
These meetings are massively helpful at reducing the overwhelm we might have at all our daunting tasks because we aren’t staring at a humongously gross list of to-dos and instead we’re looking at ONE day’s worth of work and taking it step-by-step.
Airtable to organize all the content
No lie, it’s daunting how much content we’re creating for Wandering Aimfully. Not only the new site and business, but this 5-week adventure to share all the behind-the-scenes as well. While Asana was great for the initial organization, Airtable allows us to manage the immense amount of articles, videos and image assets that pertain to content.
If you aren’t familiar with Airtable, it’s like Google Sheets got romantic with user-friendly databases and out popped an intuitive and flexible little software baby. Think of every row in a traditional spreadsheet as a "record" and then you can connect that record to all sorts of other fun data that you define.
I'll be honest, Caroline is the one who is obsessed with this product and took the time to learn its ins and outs, so I'm going to let her jump in here and chat about it.
Hey guys, Caroline here.
Okay so let me show you how I have our Wandering Aimfully content Airtable "base" set up, as well as a couple of fun things I can do with it.
Jason and I knew we wanted to post on the "under construction" site every day up until May 1st (our launch date) mainly because we just had so much content we wanted to share. The first step was to create each post we wanted to publish as a "record" (row) and then we could also assign data to each record using columns like publish date, who was going to write it, production status, category, etc.

This is the main view in our Airtable base. It lists every post by category, publish date, and status.
Here's where it starts to get awesome! Once you assign data to your records, with the click of a button you can create all kinds of fun ways to view that same data based on any column or piece of data.
For example... I can create a calendar view of my posts to see what article we have planned for each day. Just by clicking on the post name, it takes me to the corresponding record where I can see all my data: the status of the post, who's going to write it, when the draft is due, etc.

Airtable Calendar View: Seeing blog posts by publication date
Or... with another click of a button, I can create a kanban "board" view of my posts and organize them by production status (one of my original columns.) This allows me to see the various stages of each posts and quickly update the status of a post just by dragging and dropping it from one board to the next.

Airtable kanban view: Seeing posts by production stage and updating just by dragging
Aside from the coolness of creating different view of the same data, another feature I love is the ability to connect two sheets of related data.
One part of our content plan that was hurting my brain was that we planned to film certain videos or meetings we were having during our process, and we wanted to include those within these articles. To keep track of what videos we were planning to upload, I created an additional sheet called "Video Schedule."
This allows us to do all the things we could do with the blog post records, but in addition we can specify which posts each video belongs in. Connecting these two things allows us to quickly and easily keep track of the various kinds of content we have. In this view, I can see all the videos we have planned thus far, ordered by upload date, along with the blog post each one will be featured in.

Okay, just two more super cool things about Airtable. They recently launched a new product called "Blocks" which basically allows you a bunch of visual apps to utilize your data in different ways. One of my favorites is the Time Tracker block.
All you have to do is press play at the beginning of a task, end the timer when you're done, and name the record based on what the task is. This will automatically populate a new sheet with all your time entries so you can track how much time you're spending for each category across your project.
Start your Time Tracker! When you're done with your task, hit End timer...

Then watch it automatically show up on your Time Tracker sheet!
Enter your task details and the date...
I just started doing this, but I thought it could be fun to show you guys at the end of our five weeks, exactly how much time was spent on each part of the process.
There's so much flexibility and customization that's available in Airtable that I can't show you everything, but if you like organization and geek out on spreadsheets, this will take your game to a new level!
(Ps. if you want to create your own Airtable account and give it a test drive, feel free to use our referral link. Or not. Whatever works for you!)
...Okay, now back to Jason to finish out this post!
A final word on the best tools to use for productivity
Here's the secret:
The best tools are the ones you'll actually USE and the ones that will help you work smarter or faster.
Don't trick yourself into thinking that the tool itself is what's going to finally get you off your butt and working toward that goal of yours. If you don't have the discipline to actually use the tools, then it won't matter. Hard work is necessary whether you use the most advanced apps or you use straight pen and paper. However, if you are someone who gets easily overwhelmed, try experimenting with different processes and methods of organization until you find something that feels like it gives you a leg up.
We hope you enjoyed this look at our project management process!